Make your own DIY Hobnail Bedside lamp from an old lamp and some hobnail trim.
When we got married, almost ten years ago, we bought these two bedside lamps for our bedroom. They were a bit small and characterless, but it was what we could afford at the time. The bases were dark brown, and I did not wait long to paint them in the teal colour that matched our bedroom colours.
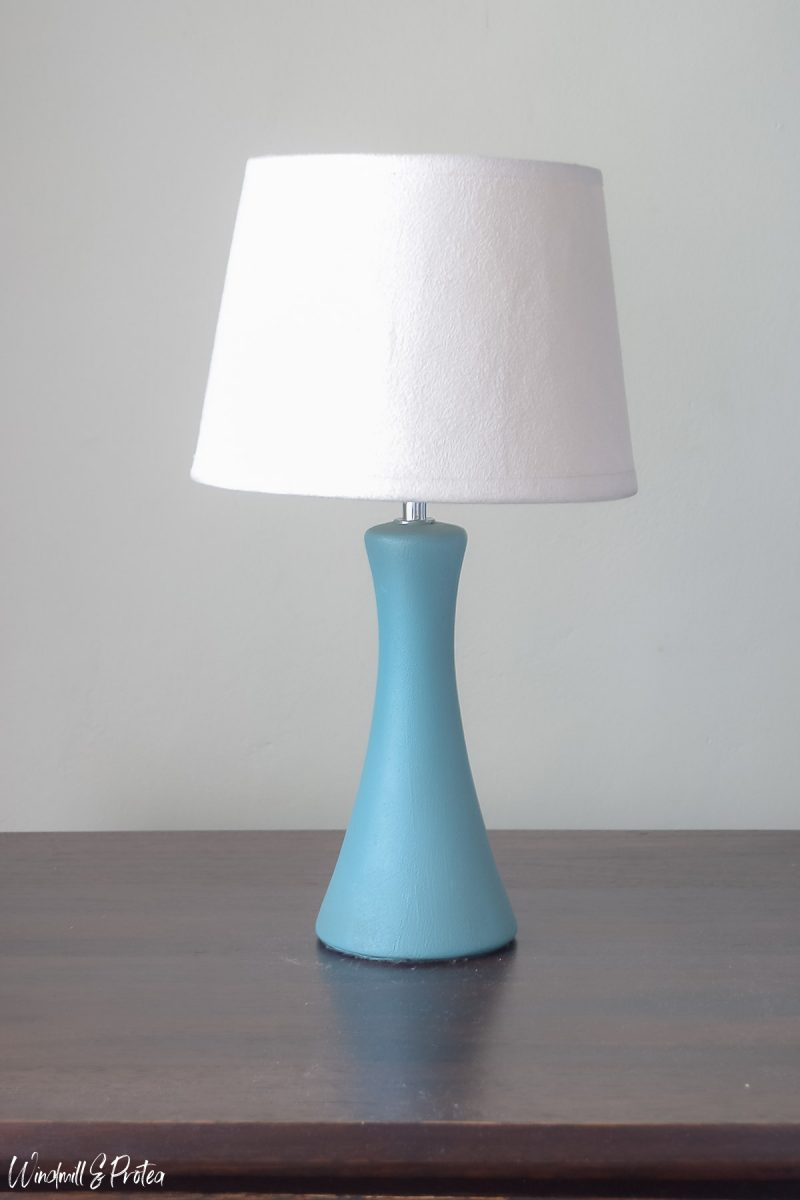
But as the years passed, my lamp broke twice. It fell off the bedside table twice, and the base broke. The second time this happened, it broke in half completely. I took this as my cue, to not only fix the lamp this time but also to update them a bit. When I saw this lamp, I immediately knew that I wanted to try and replicate the look on our lamps.
I love the texture on that lamp – the pattern makes me think of sea urchins. We recently went on a quick trip and visited one of my favourite spots to pick up shells. I always find loads of green sea urchins in those rock pools there and add them to my collection. I think that is why I was drawn to the texture of this lamp!
Thrifty Thursday: Less is More
I finished this lamp update just in time for this month’s Thrifty Thursday post. I team up with a couple of very talented bloggers, and we all share our thrifty & frugal projects. With this collaboration, we hope to teach you how to make more out of your home décor for less. Please click through to the other’s posts at the end of this post and show them some love.
DIY Hobnail Table Lamp Makeover
Supplies needed for your lamp transformation
- The table or bedside lamp of your choice. You must look at the shape of the base and determine if this technique will work. You will need a simpler profile for this project.
- Flat jute rope and hobnail trim. I got the rope from my local craft store, and I searched for the hobnail trim at a fabric store’s embellishments’ section. Look for a rope that has a nice texture, but that is not bright in colour. You will struggle to paint a bright purple ribbon white, for instance. For this reason, I went for a neutral jute rope.
- A glue gun and glue sticks.
- Spray-primer and the paint of your choice for the topcoat. I used Plascon Velvaglo in the colour of Frozen Limeade.
- New lampshades if you need to replace them too. Or if you want to recover your existing shades, this is a pretty good tutorial.
How to start with your lamp
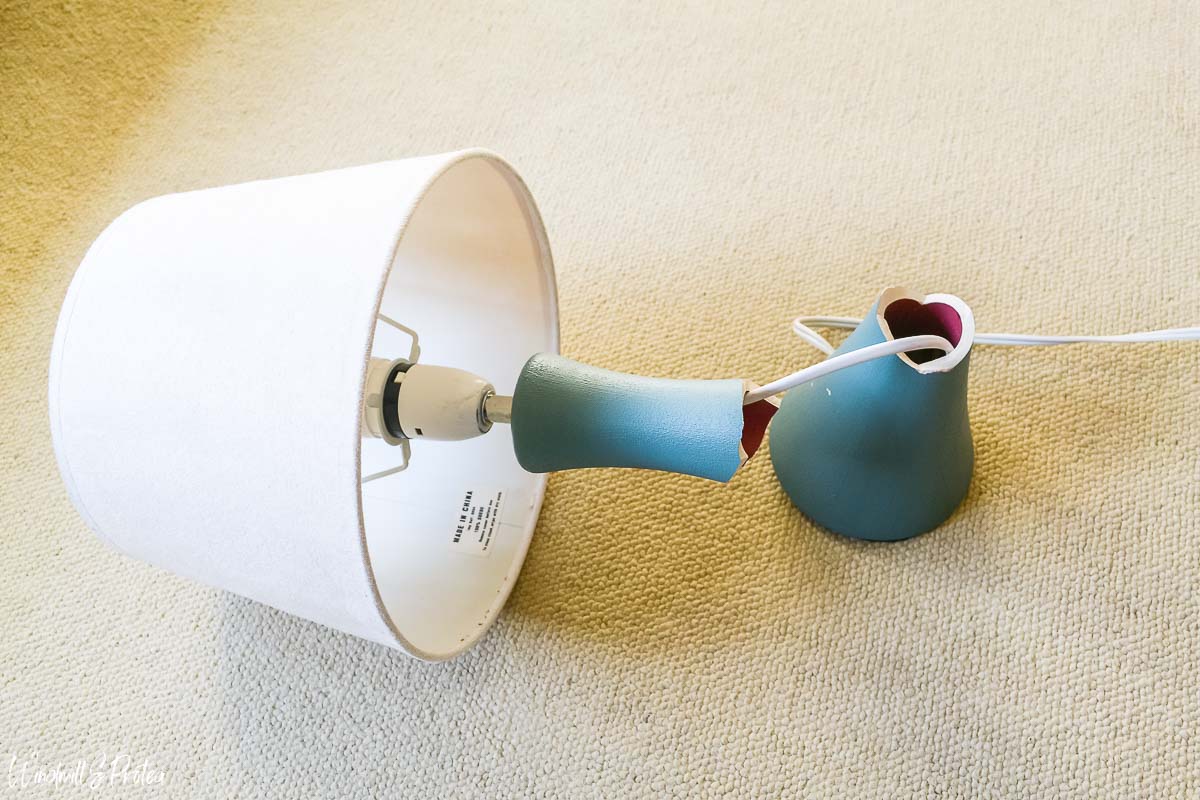
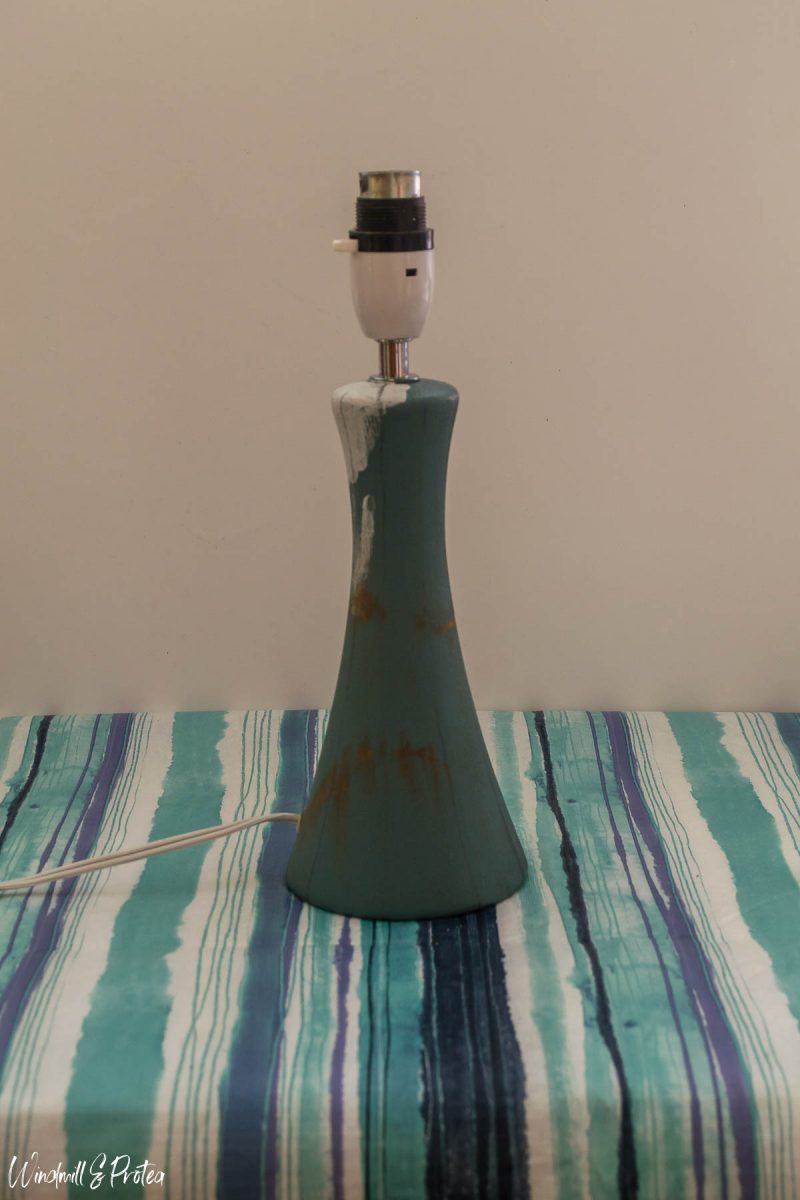
I still had to fix my lamp, so that was my starting point. I glued the pieces together with superglue and filled the chips with wood filler. I waited until it was fully dry before sanding it a bit. I knew that I would cover the surface of the base, but did not want to take the chance and have cracks show through.
You also need to remove the globe and lampshade. Clean your lamp base to get rid of any greasiness.
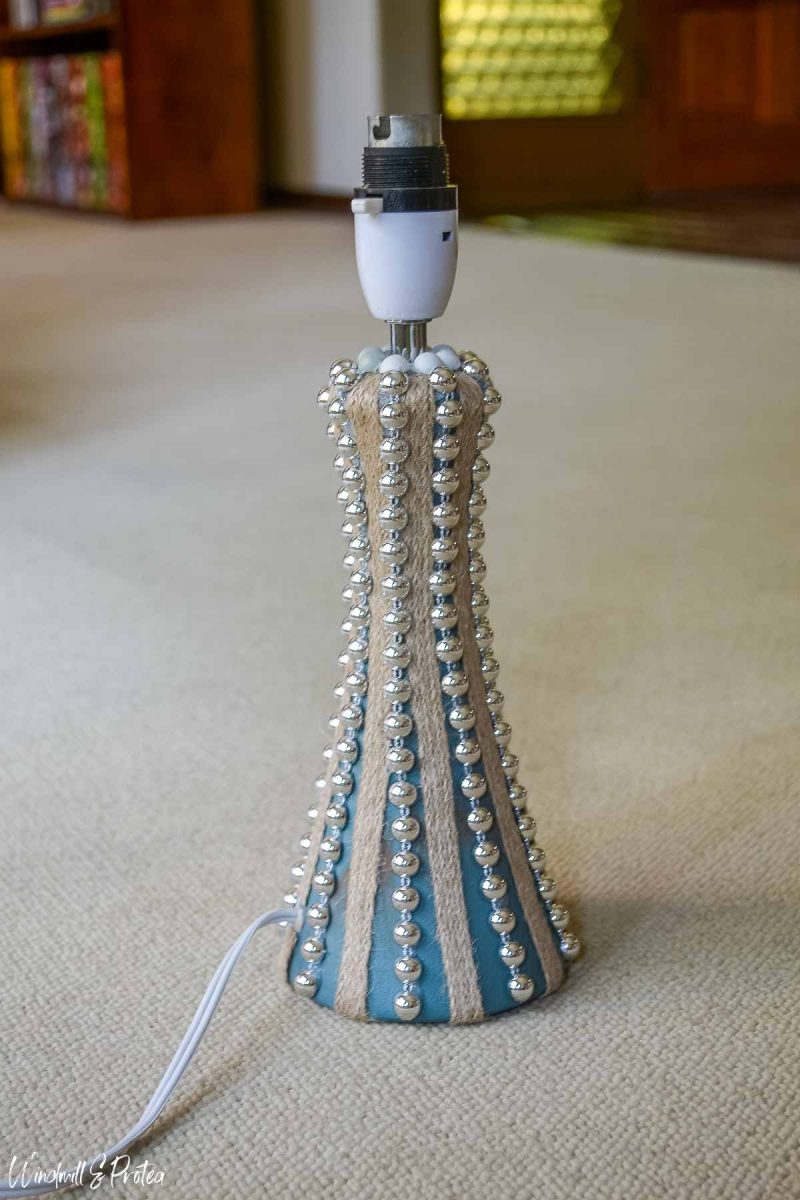
Measure and cut your hobnail trim and rope
Measure the length you need for your embellishments. The easiest way to do this is to use some prestik to attach the rope and trim to your lamp base. It will help you determine the spacing and length, and then you can go ahead and cut.
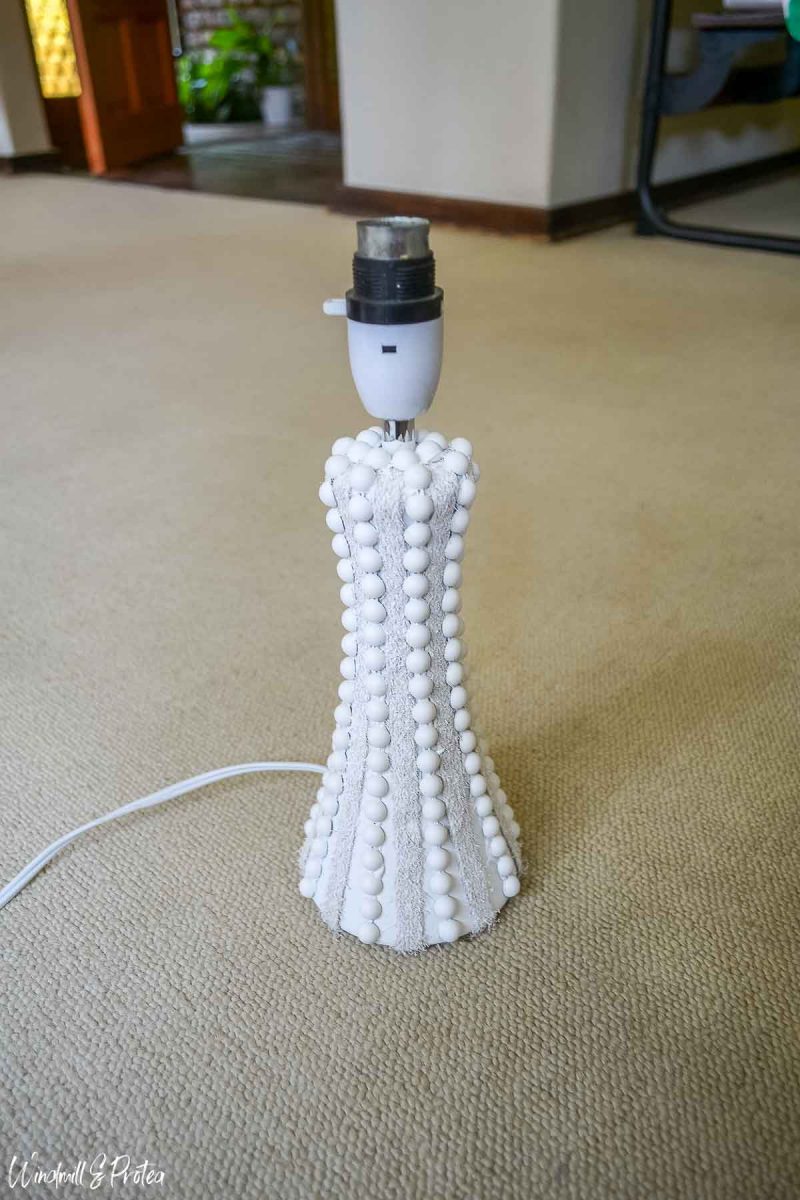
I let my jute rope wrap around to the bottom of my lamp base but stopped the hobnail trim right on the bottom edge of the base. I also added a hobnail circle right at the top of my lamp base.

Glue your rope and trim to your DIY hobnail lamp
Next step is to glue your rope and trim to your lamp base. I started with the rope as I have spaces where the trim overlaps with the rope. I used hot glue to attach the rope to the lamp base. Work one section at a time and make sure you use enough glue. You really do not want areas that are loose once you start to paint.
When you are done with the rope, you can move onto the nailhead trim. Once again, make sure that you apply enough glue to every section of the trim.

Prime and Paint
Tape off your lamps electrical components with newspaper and painters tape. My hobnail trim was very glossy, and I knew I needed to prime if I wanted the paint to adhere well. Also, as mentioned above, if you do use a rope or twine with a bit of colour in it, use a spray primer with a stain blocker. (Though I think it is still better to use something neutral – talking from experience here).
I sprayed two light coats of spray primer and allowed the paint to dry.
Now you can choose your paint and colour and start painting your lamp. I used a 25mm paintbrush and applied the paint in a thick coat. I left it to dry for a day before touching up some spots with a small craft paintbrush to make sure I get into all the hard-to-reach places.

Techniques I used
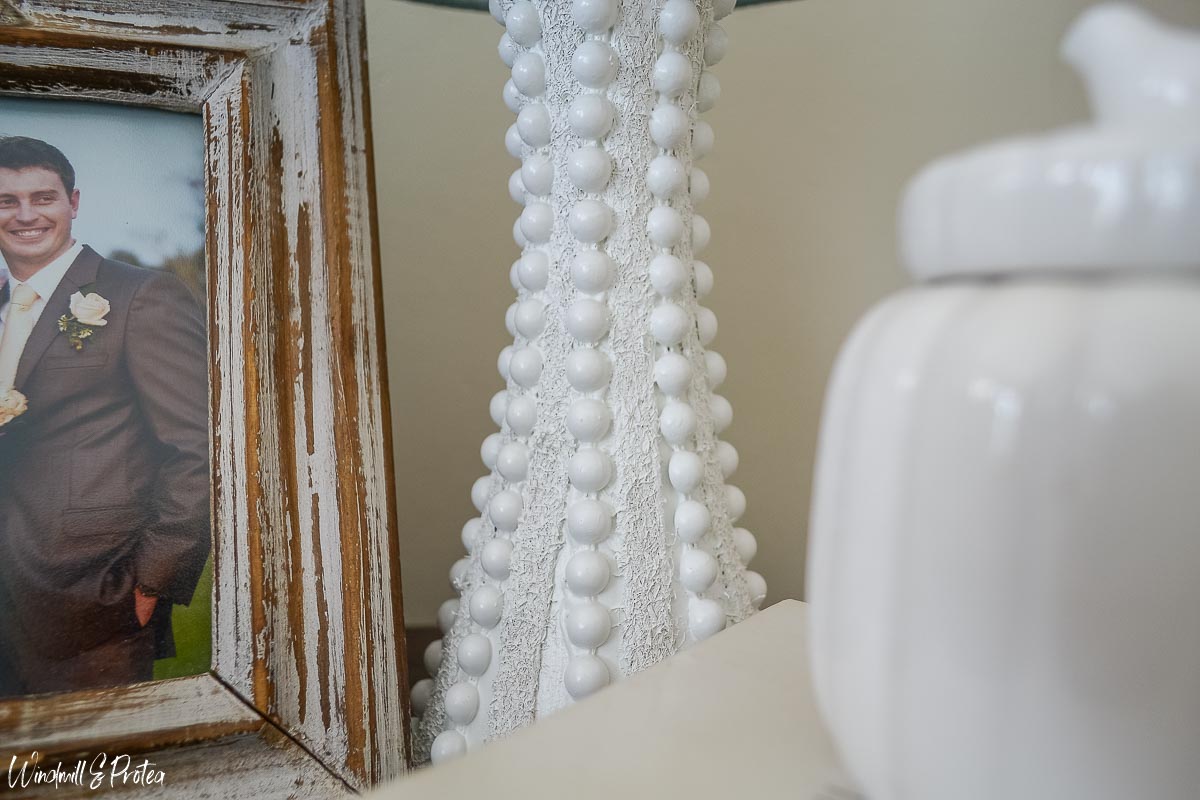
I applied the primer in light coats because that is always best. But I applied the coat of paint with a big brush in a thick coat. This technique, plus the satin finish of my paint, makes it look a lot more like real ceramics. It helps to fill up gaps between your embellishments and lamp base, making it look like a whole. As the primer is white and my chosen colour is slightly off-white, I only needed one coat of paint plus a bit of touch-up. You might need more coats – depending on the type of paint you use and the colour you choose.

You can also take a look at the video tutorial I made for this post:
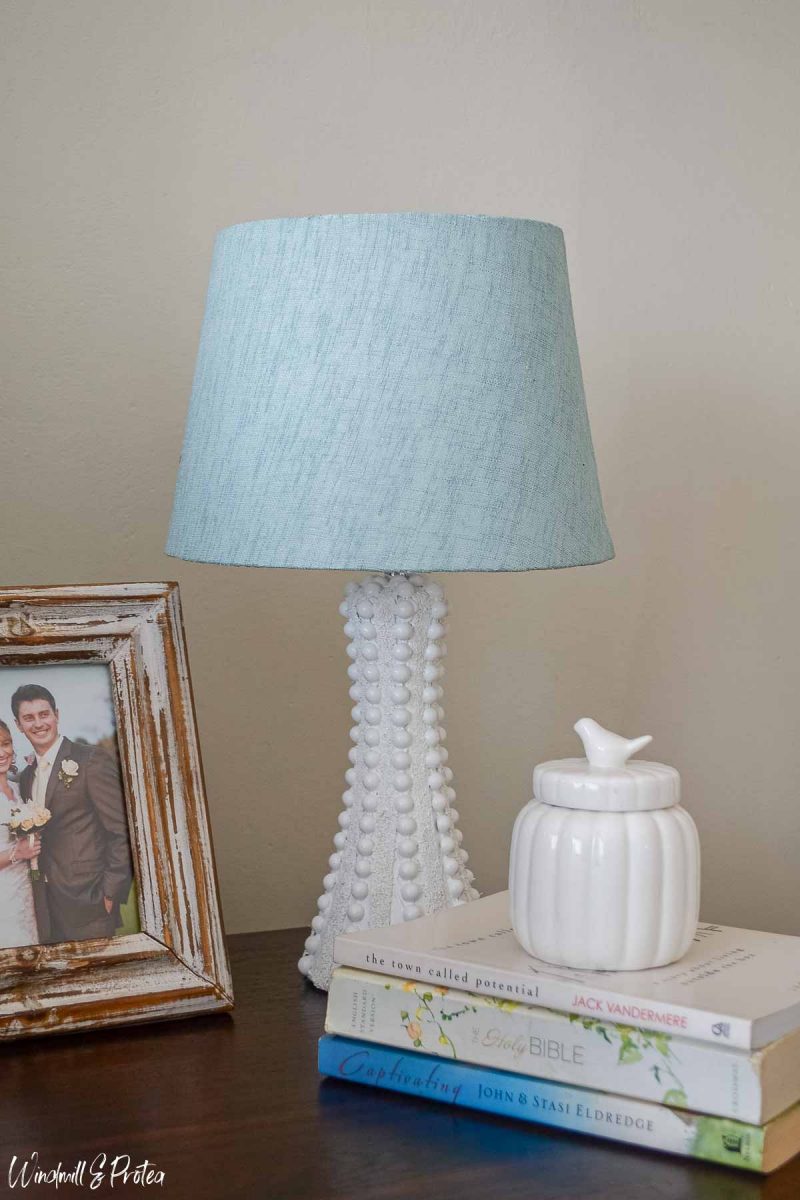
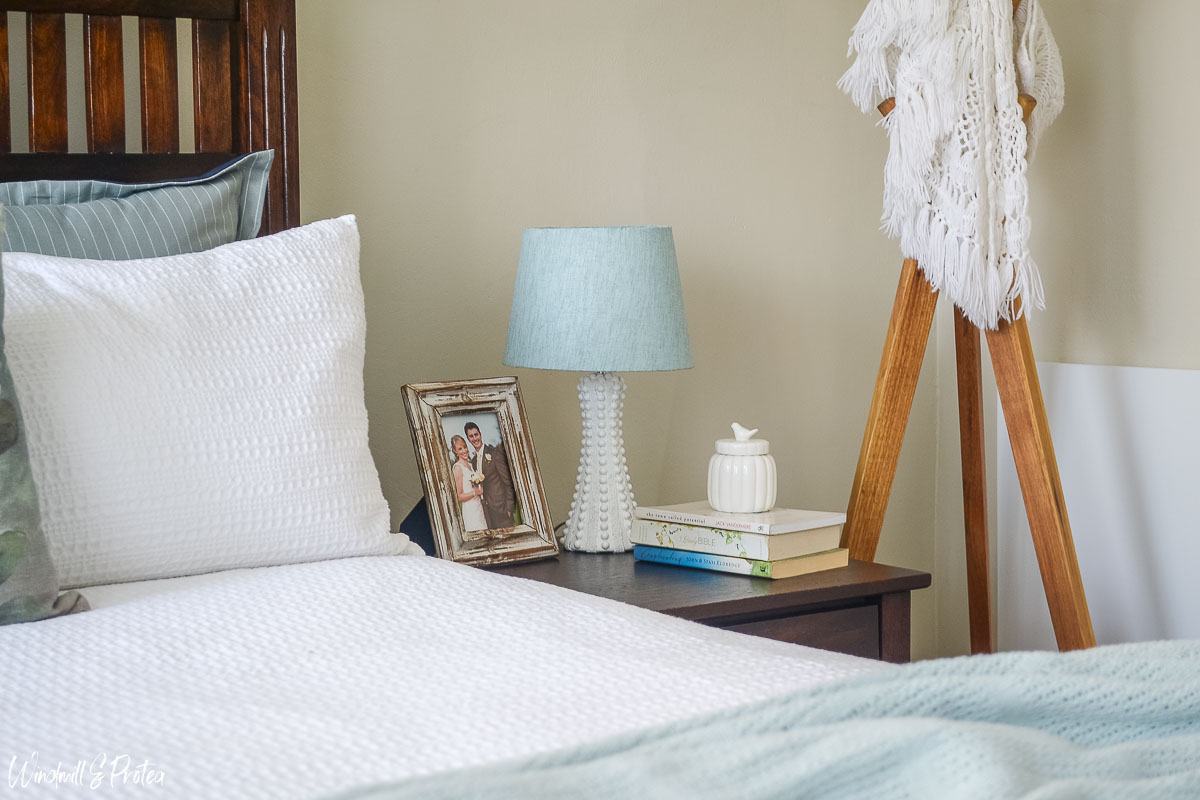
And with that, your DIY Hobnail Bedside Lamp Makeover is complete
I found this project relatively easy to complete. It has a bit of wait-for-the-paint-to-dry time, but it should not take you too long either. I finished the new lamp off with a new light aqua, but with beautiful texture, lampshade and it looks stunning on my bedside table. Now that I know I did not ruin the lamp, I can go ahead and update my husband’s lamp as well.

Thrifty Thursday Posts
Please take a look at these talented ladies too!

- Brianna from Bloom in the Black made coasters from an old leather skirt. How creative is that? And look at how amazing they turned out!
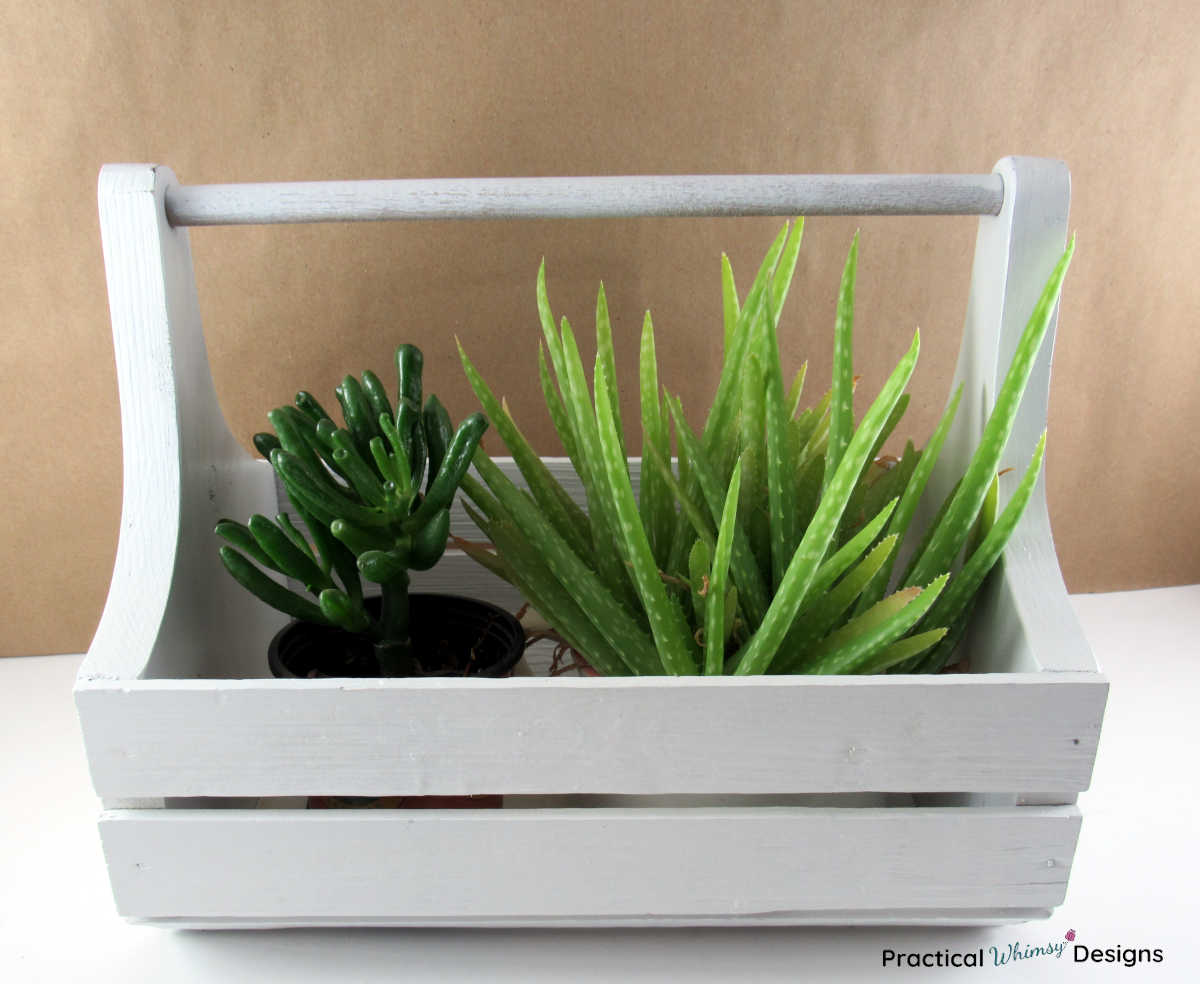
- Erin at Practical Whimsy Designs painted a wooden caddy. It now looks great with her succulents, or it could look pretty for seasonal table décor as well!
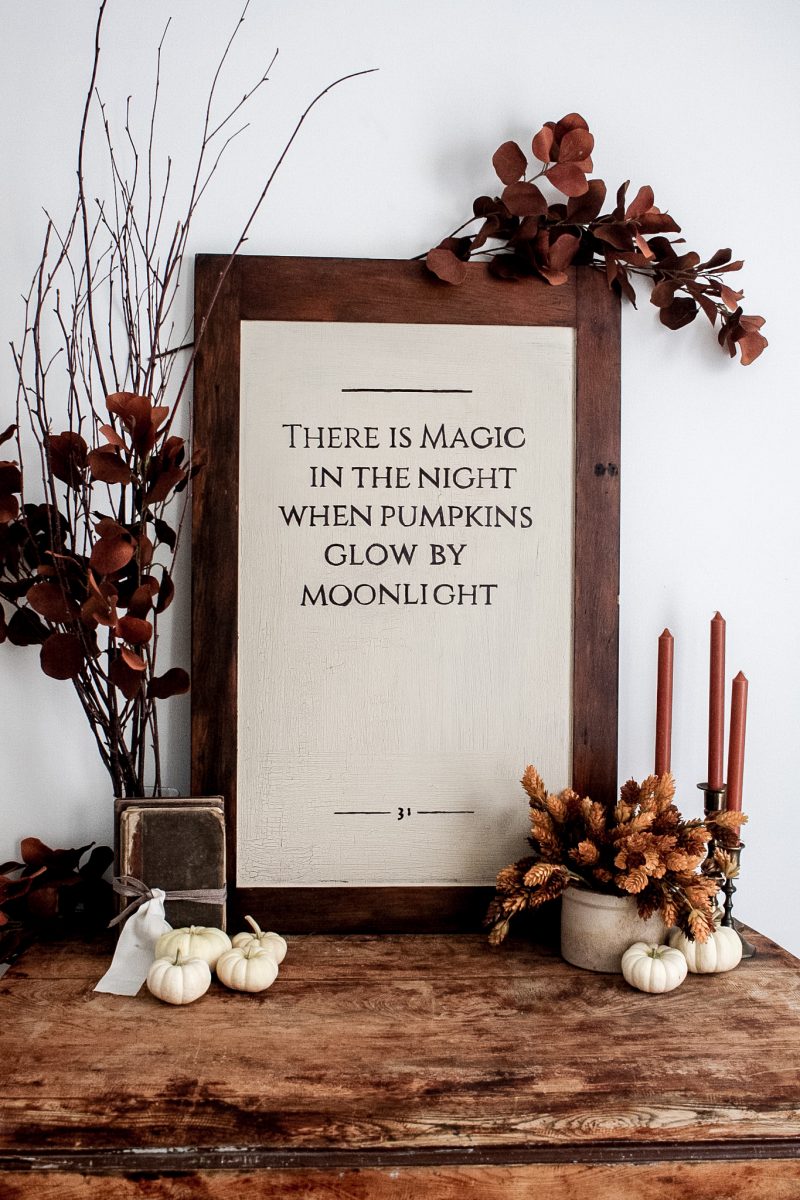
- Jaclyn from One Thousand Oaks made a Halloween sign. I love the style!
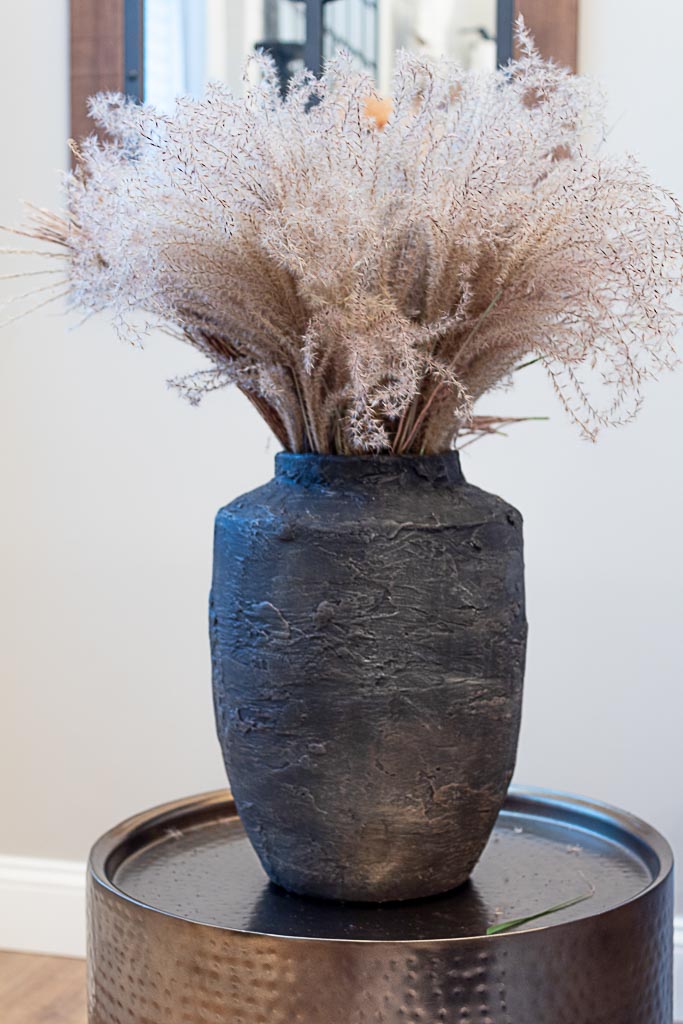
- Martina from The Lived-in Look transformed a vase with plaster. She got some gorgeous texture to the vase!

- Sara-Lynn at The inspired Decorator made this gorgeous rope tray. I definitely need to make one of these for my Christmas Décor!
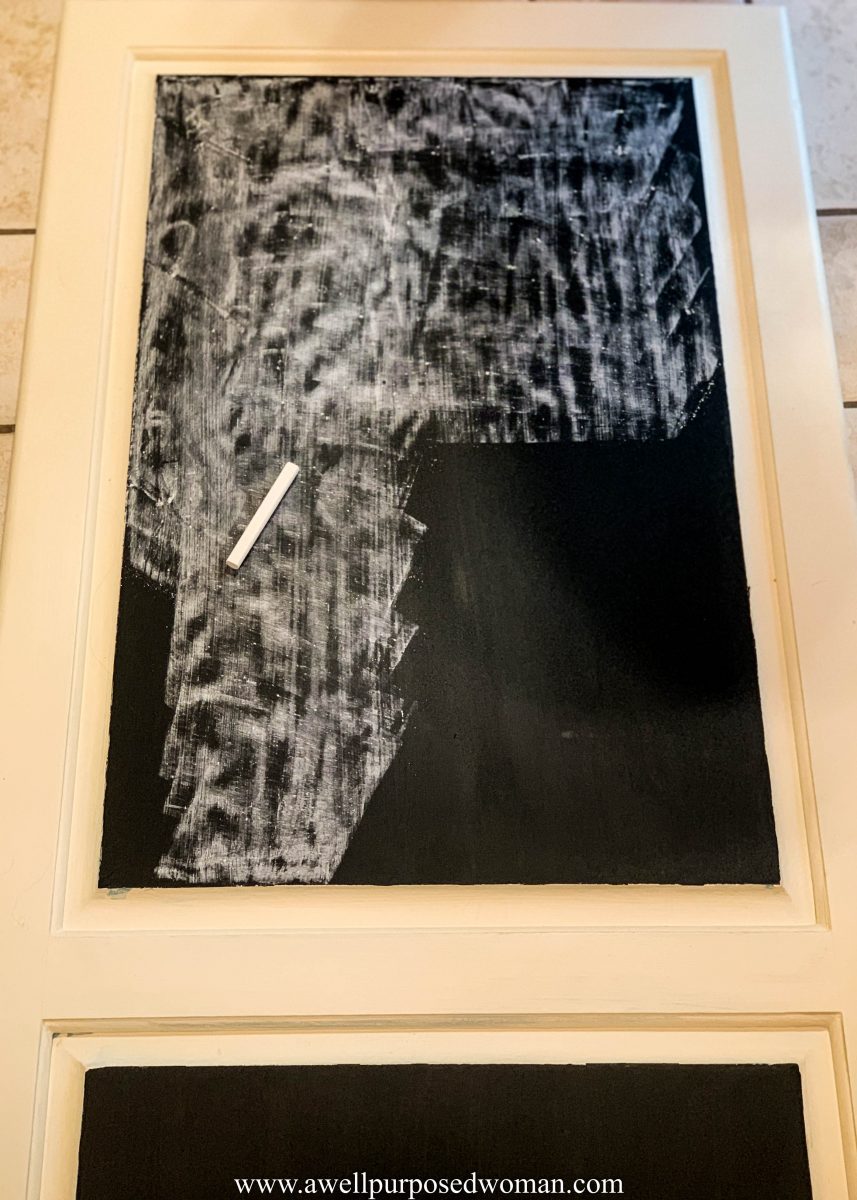
- Elizabeth from A Well-Purposed Woman made a chalkboard from an old cabinet door. Just think of all the fun you and your kids will have drawing pictures on it.
And that is it for this month’s Thrifty Thursday post. I hoped you enjoyed my table lamp, upcycle. I’ll be back soon with another progress post on my home office makeover that I’m doing as part of the One Room Challenge!
Until then, take care!


6 Comments
Brianna
This came out fantastic Junette! It’s completely transformed.
October 29, 2020 at 4:33 pmJunette
Thank you, Brianna! I love that I could give these lamps a new chance on life. ;0)
October 29, 2020 at 9:07 pmMartina
You outdid yourself with this one! I was struggling to figure out how to create a hobnail look a few months ago on another project. Great job!
October 30, 2020 at 1:51 pmJunette
Thank you, Martina! I’m thrilled with how it turned out, but I was so worried at a stage there when I started adding the trim. ;0)
November 1, 2020 at 8:15 pmErin
I love how your lamp turned out. Great tutorial and idea!
October 30, 2020 at 10:19 pmJunette
Thank you, Erin!
November 1, 2020 at 8:13 pm