How we Updated our Piano Stool Without Spending a Dime
We recently procured a second-hand Knight Piano. It was manufactured in the 1950s, and although we had it fully serviced on the inside, the outside and the piano stool needed some attention. We started with the easy one first: the piano stool.

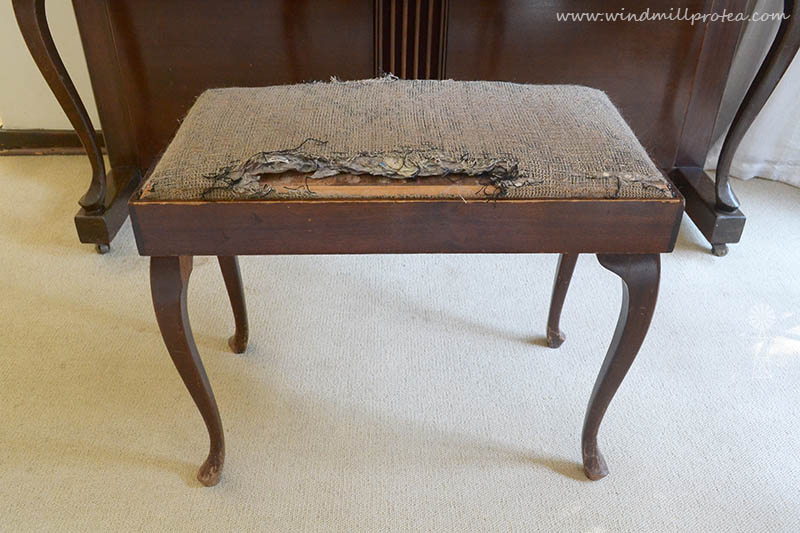
As you can see, it looked horrible! It is a flip-top stool, but the upholstery was not worth saving, the wood had chips and scratches, and there was a small corner piece of the lovely cabriole legs missing. The upholstery fabric and cushion had worn away where the previous owners opened the top, so I realised I would have to create some sort of handle to lift it with to avoid the same happening again.
Taking the Piano Stool Apart
I removed the hinges and kept the screws and hinges in a zip-lock bag. (I lost one screw, so make sure you keep everything together so you can use it again). Marinus took over the wooden chair part, and I started work on the upholstery.
I removed a lot of nails and threw everything but the wooden base away.

A New Cushion
Supplies used:
- I had cotton and quilt batting on hand, and I used that to create a new seat cushion
- Needle and thread
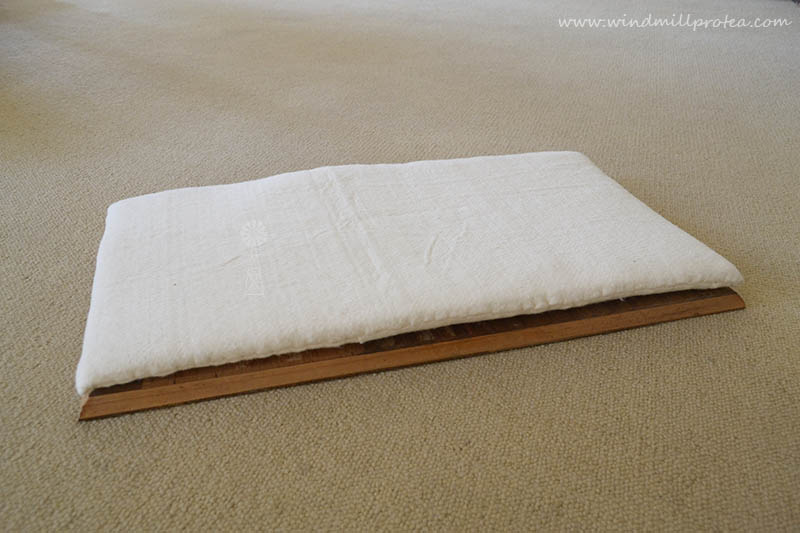
I made a new seat cushion with the cotton batting on the inside and quilt batting on the outside. As mentioned, I had it on hand, and I’m not planning any other projects with those, for now, so I decided to save money and use what I have. I quickly hand-stitched and made the cushion the same size as the top of the wooden base.
Adding New Upholstery Fabric
Supplies used:
- Upholstery fabric, again, I had this in my stash
- Staple gun
- Needle and thread in a colour matching your fabric
Cut a piece large enough to cover the top of your seat. Place your fabric right side down with the cushion and wooden base on top. You will be covering the screw-holes, so be sure to remember what side they are on. It is not a bad idea to mark them on your fabric with a fabric marker; It will make installing the hinges again a lot easier.

I stapled the longer edges first, pulling the fabric tight, but making sure that I kept a straight line in the fabric pattern. If your fabric has an organic design, it does not matter, but if you have lines or blocks like mine, be sure to keep your lines straight.
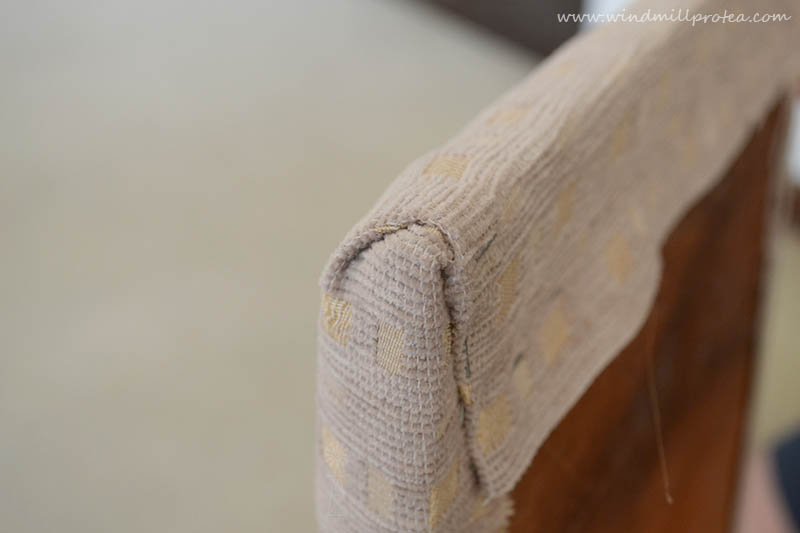
I folded my corners like you would fold wrapping paper. Make sure they are neat before stapling the corners as well. You can trim access material, so it does not add bulk in the corners. Then I continued onto the short edges in the same manner.
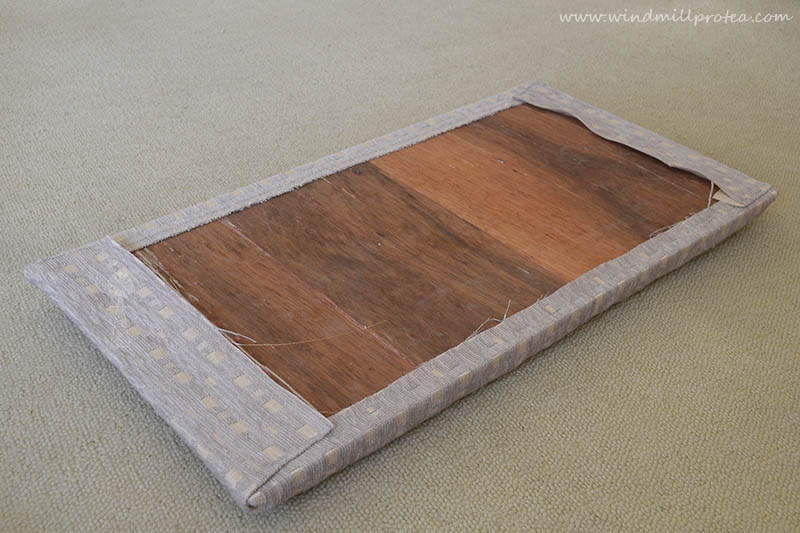
I also covered the back as it is visible when open, and in this step, I inserted a faux leather pull handle, to open the top easily without damaging the fabric. Make sure you add the pull on the opposite side of where your hinges will go. Place it in between the two layers of material, and staple it in place, as shown below.

I stapled the first edge as shown in the picture above, these staples will be hidden. Then I folded the fabric over onto the base and folded in the other corners, pulled the fabric tight and shot in some staples as guides – you will remove them later on, but they help to keep everything in place.
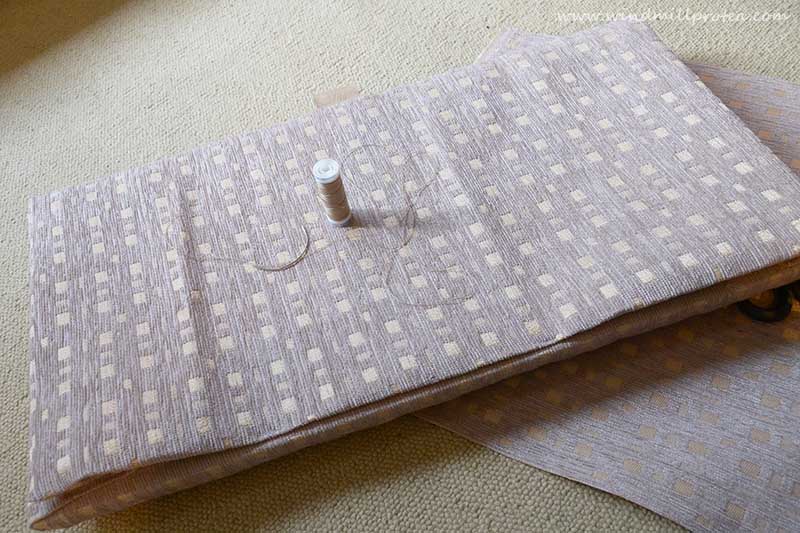
I then used a curved upholstery needle to stitch up the remaining three sides by hand. It is really not difficult – this tutorial taught me how to do ladder stitching. (I’ve learned loads of sewing skills from Wendi’s tutorials. If you are a beginner sewer, it is worth going through her lessons). A curved needle is a must for this step. With the wooden backing, you can’t manipulate the fabric as with a soft toy. The curved needle helps with this. The result is a professional looking finish with no visible staples.

Refinishing the Wooden Stool
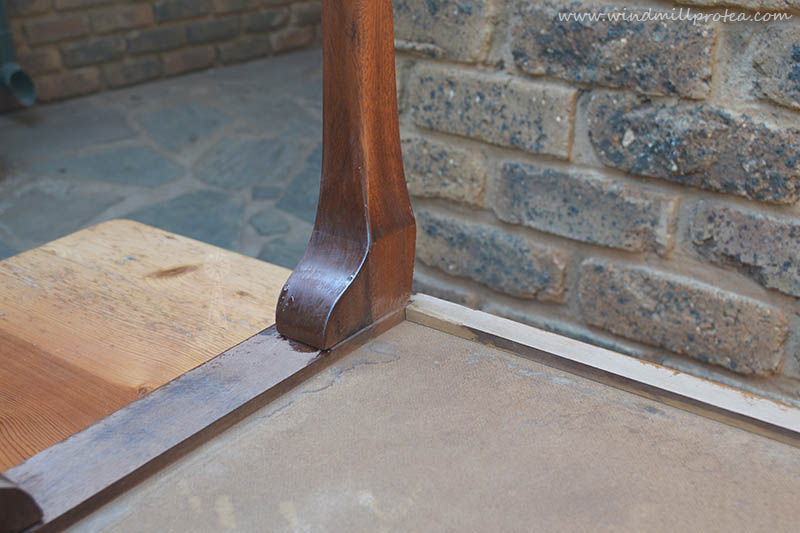
Marinus worked on the wooden stool. He sanded the wood surfaces, and we then realised that it was made from different types of wood and that there was quite a bit of variation. We decided to show the wood off, instead of covering it all with a dark imbuia stain as it was before. So we used a clear wood varnish for the stool.

We also had to replace the corner piece of the one leg that was missing. Marinus traced the profile from one of the other legs and made a piece to match from some (real) imbuia we had in the garage, which he glued, clamped, sanded and sealed with the rest of the stool.
Assembling the Bench
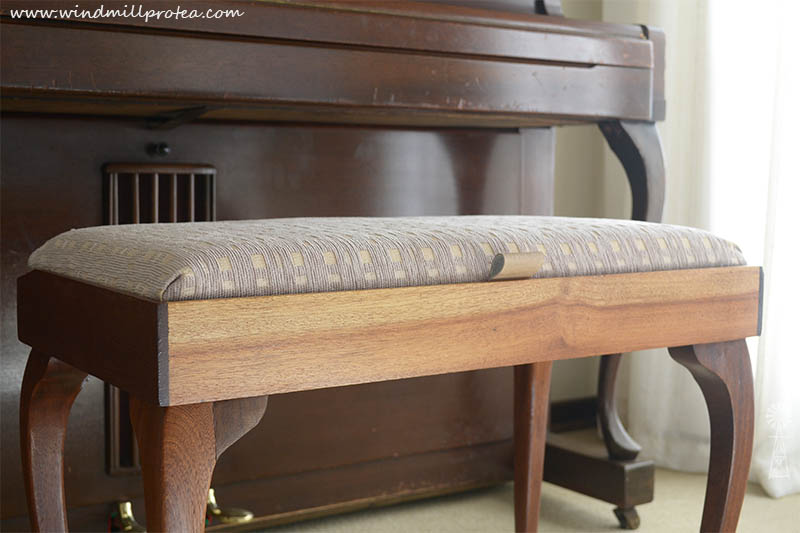
Then we were able to assemble the bench again! We started by fastening the hinges to the wooden stool first and then aligned the upholstered top to be able to match the existing screw holes. I did not mark where they were, but luckily, we did not struggle too much to find them again.

We are so happy with how it turned out. I like the lighter wood more as I prefer medium wood-tones instead of dark. We also still need to address the piano; it has a lot of scratches. Some panels are solid wood, and some are veneer. We have to decide still on how to address these issues, but I’m sure we will, as always come up with a solution, and then I will document the process as well.

The faux leather pull works and looks great too!
To Conclude: A Budget-friendly Furniture Project
Sometimes it is easy to do a small project like this one for minimal cost. We had all the materials we used on hand, from the fabric to the clear varnish. “Shop” your own home first before going out to buy supplies; you might have forgotten about a piece of upholstery fabric that would be perfect for your project.
Basic upholstery is easy to do. Just remember to pull your fabric tight and keep your lines straight. And if you are willing to try out a couple of hand stitches, you will have a professional result!
What do you think of our Piano Stool update? Do you have any tips for me on how to refinish a piano? I would love to hear from you in the comments below.
To save this post for future, please pin it here:
If you would like to be notified of future posts and receive extra tips on decor and design, be sure to subscribe to my newsletter!


5 Comments
teresa
Great job. Thanks for the hints and tips. I have a piano stool awaiting up cycling in shed. Your project will help me when I am able to go out and access some material for upholstering the top. In the present times I am unable to do that and strangely enough do not have a piece of material suitable! Stay safe and stay home.
April 29, 2020 at 3:11 pmJunette
Thank you Teresa – I’m glad my tips helped you! Yes, it is so difficult when you can’t just pop out to the shop to buy something, right? Good luck on the upcycle and stay safe!
April 29, 2020 at 8:22 pmLindsey F
I love the detailed tutorial! How did you get the hinges reattached underneath the lid? I’m struggling to know how to how to get the hinges back on after I get the new fabric secured.
March 15, 2023 at 12:20 amJunette
Hi Lindsey. Thank you for visiting. We attached the hinges to the stool first, then aligned the upholstered top to where it should be sitting on the stool. Then we could install the hinges to the upholstered top – but it was a two-person job. I did not make marks of where the screws should go, so it was touch and go, but we did manage to get them into the original screw holes of the base. I hope it makes sense.
March 30, 2023 at 1:25 pmJ
Syl Hayes
Thank you for the very helpful post. My piano stool has a tapestry top attached to black velvet edging which is connected to the wooden edges with gold upholstery pins. The lifting edge of black velvet has frayed a lot over the 50 years since I first repaired the stool and I love your idea of a handle, which I shall incorporate into the new version.
June 4, 2023 at 2:10 pm